
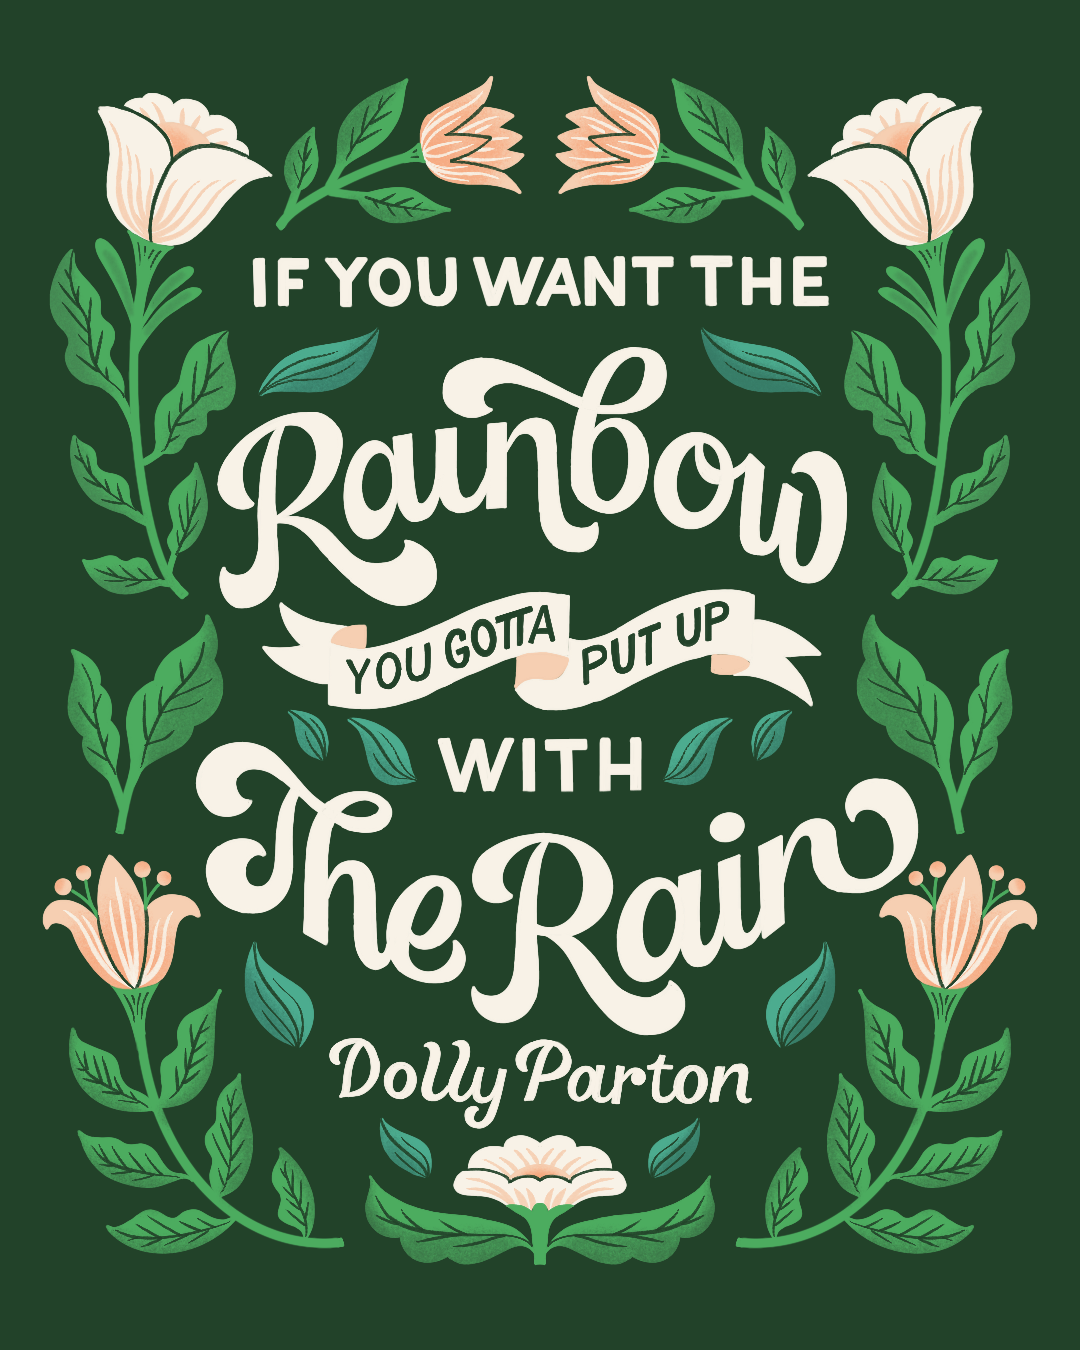
My Lettering and Illustration Process
As a professional lettering artist and illustrator for the past few years, I thought it was high time I gave you all an inside look at my full process for creating my lettering and illustration pieces. This particular design was client work created for Bloomscape for their Instagram.
For this piece and for most of my work, I use Procreate on the iPad Pro with Apple Pencil. This allows me to work quickly and efficiently, which is especially important for designing client work.
⠀⠀⠀⠀⠀⠀⠀⠀⠀
Here’s a behind-the-scenes of how this project went from blank page to final artwork!

Step 1: Select Thumbnail
The first thing I do is create a set of thumbnail sketches. As I explain in my blog series 4 Steps to Better Lettering, thumbnails are small sketches of your lettering design. I create these thumbnails as first drafts of my artwork to explore as many concepts as possible. In this case I created about 5 thumbnail sketches before choosing the composition I wanted to move forward with for the sketch phase.
Step 2: Add Guides
Next, I blow up the size of my thumbnail to the size of the final artwork. I then use this rough sketch to lay out my guidelines. In this case you can see I moved my guidelines around quite a lot once I got everything up to scale.


Step 3: Draw Skeleton
Once I have my guidelines drawn, I sketch out the skeleton of the letters and the illustration. Since I work digitally, I’m able to easily resize, rearrange, and adjust the elements as needed. I will use this layer as a guide for the next layer.
Step 4: Add Weight
Since quotes are usually the most prominent elements of my work, I start with the lettering. I decide on the styles of lettering I want to use (in this case, retro 70s script with a simple sans serif) and then I add weight to them.


Step 5: Fill Letters
After the outlines are done, it’s extremely important to fill in your letters. This gives you a more accurate view of how much visual space they’re taking up. I often make more fine-tuned adjustments in this step.
Step 6: Sketch Illustration
Finally, I use the illustration guides to draw the illustrative elements. If I’m drawing something simple like flowers and leaves, I usually do this in just one step. If I’m doing something more complicated, such as animals, hands, or people, I may build up the illustration in a couple of layers.


The final sketch.
Once I finished this sketch, I submitted it to the client for approval. I typically send 2 to 3 sketches in the first round of review, but I was fortunate that this client gave me full creative control, so I only submitted one. They had no changes for me, so I moved on to the finalization process.

Step 7: Add Color
The client provided a color palette, which always makes it so much easier. I laid down the color fills and then took an eraser to bring back some of the details in the leaves and flowers.
Step 8: Add Details
I used the peach and cream colors to add more details on top of the color fills for the flowers.

Step 9: Add Texture
In the final step, I added a darker texture to all the leaves to give them dimension. I also added a darker peach color on the flowers as a subtle shadow.

The final piece.
And that’s it! I hope it was fun and helpful to get the inside scoop on how I create my work. What other inside looks of my business would you love to see? Leave a comment below and let me know!
